Note: our mobile app is not available anymore.
A while back we have written about creating a free app with Appmakr.com. After getting some basic graphics done, deciding what content should be available through the app, getting advice from a programmer, taking a break, an overall pretty steep learning curve and some waiting for approval, we’ve finally done it!
Or search for ‘fundraising ideas’ on your iPhone, iPod or iPad. Please do leave your review within the app store! If you have any questions or suggestions, please comment below.
Note: If you’ve clicked over from Apple’s website, please ask any questions in the comments below.
To read more about how we got started making this app, click over to Mobile App on a Small Budget. If you’re curious about getting your own mobile app, read Are You Considering a Mobile App for Your Non-Profit?
Our fundraising app
Since it’s a do-it-yourself service, Appmakr.com doesn’t provide endless features, but the ones it does provide are essential and are pretty good! For example, if you have a WordPress blog, or any other kind of blog, you can simply add your feeds to deliver your articles.
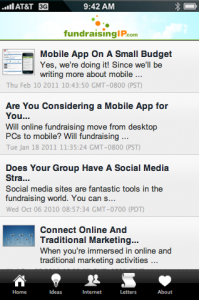
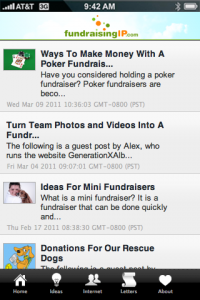
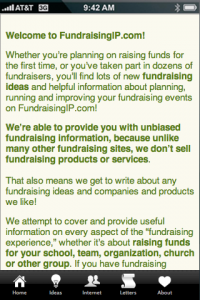
We’ve used our most popular feeds and added tabs for fundraising ideas, internet related articles (like this one), fundraising letters and our main feed to browse through latest articles. We’ve also added one static About page. Very simple!
As mentioned in another article about mobile apps, you don’t need an app if you want people to be able to access your site on a mobile device. If you’re running a blog, you can simply install a plug-in to format your blog for mobile access and you’re all set.
The advantage of having an app is that your website, your group and message can be marketed through a whole new channel that millions of people all over the world have access to. Another advantage is that you could add functionality to your app that your website can’t offer, like location services, push notifications etc.


Are you ready to create an app with Appmakr.com? Here is what you need to know or do to get started:
1. Learn about what a ‘feed’ is and how it works. ‘RSS’, ‘feed’, RSS feed’ etc. all stand for the same functionality. If you have a blog that uses WordPress, or you’ve signed up for a blog through Blogger or Blogspot for example, your blog already has a feed which is marked by this familiar icon
![]()
A feed automatically broadcasts any article you post through different channels: it let’s the search engines know that you have a new post, it triggers emails to your blog subscribers if you’re signed up through a service like Feedburner, it sends your article to anyone who has signed up to your blog’s feed with a feed reader, and it also broadcasts your articles to any place that you’ve added your feed to, like this free app, and also websites that allow you to add your feed.
For example, the feed address to our articles is http://www.fundraisingip.com/feed.
You will be asked for your feed URL when you create your app. Yours may simply look like this http://www.yourblogsURL.com/feed. You can also add feeds for different categories of your blog, which would look like this http://www.yourblogsURL.com/category/feed. Go ahead and try it out with your blog’s web address!
You can also add your photo feed from sites like Flickr, a location feed, simple static pages, or your Ning social network (for a fee).
2. If you simply want to add static pages, you have to know some HTML to format your pages. A good place to start learning for free is w3schools.com. In fact, this is a great website to learn about any web related technology for free!
3. Create graphics for your mobile app: this includes a button that will appear in the app store at 512×512 pixels, a welcome screen or splash screen at 640×960 pixels and a header graphic at 640×88 pixels.
4. Sign up for an iOS Apple Developer Account at $99 per year. This is the only expense that you can’t get around. In order to get your app into the app store you have to have this account and you have to renew it every year.
Important: Appmakr.com has a functionality in place so that you don’t necessarily need an Apple computer to create the app on their website, but to actually upload the app to the Apple store you need a Mac.
5. Within Appmakr.com you will be asked to create Developer and Distribution Certificates in your Apple Developer account and upload them to Appmakr.com. You have to make sure you follow the instructions to a ‘t’ and in the right sequence, otherwise it won’t work. We had already unsuccessfully tried a few times when a developer friend recommended to delete every certificate we had created and then simply start from scratch. Then it worked!
You can sign up with Appmakr.com to do this part for you, but it can be pricey. It still may be worth it to you to have your app out there.
Bottom line for creating your mobile app in Appmakr.com:
If you know a little bit of HTML and feeds and can get the graphics done yourself, the process is pretty simple and your only expense will be the $99. If what you just read is all new to you, you can still get your app done by hiring a graphic designer to do the simple graphics (should be fairly inexpensive) and a programmer through a site like oDesk.com to help with the process of creating the certificates (this should also be inexpensive, because you’re not asking them to program anything).
Whichever way you decide to go, or if you have questions, please let us know in the comments!
Update: AppMakr.com is now part of InfiniteMonkeys and the process is a bit different now. You can still get your app for free though!
Update 2: We had so much fun making the app, we made another one! Download our beautifully illustrated ABC Flashcard App today – it’s free as well!
